Sunday, August 14, 2011

Swiss Chard... what to do with it?


After my last post explaining the bounty of our swiss chard, I thought I should tell you what I'm doing with it. Well, trying to do anyway.

I harvest it by grabbing a bunch and cutting it off near the base. More will grow back.

Then you need to wash it. By the way, this is more difficult than you may think. The dirt likes to stick in the celery-like stalks and cling to the leaves. Even after a couple soaks in cold water, I find myself scrubbing at the stalks with a potato scrubber, and using my fingers to get final grains of dirt off the leaves. To do this for each leave is a bit time-consuming. So do the best you can.

At this point, a more particular cook would advocate separating the entire stalk from the leaf. However, since I'm not that particular, I just cut off the bottom part of the stalk and throw it into a pile. You can choose to chop off the stalks and cook them first, since they take longer to cook than the leaves, OR you can give them to your pigs and chickens, OR you can compost them. (And actually, I'm not even THAT particular anymore... I just chop it all up and throw it in the pan!)

There are several options for the cook at this point.
  • Freezing. I throw in as many leaves (wet from their wash) as will fit into my 5-qt. cooking pot and let them wilt till about 1/3 of their size, about 2-3 minutes. Then I throw them in a pan to cool off. I measure some into freezer baggies, and into the freezer they go. I'll plan to use them in egg bakes, quiches, and other hot-dish type entrees.
  • Frying. I heat up butter or coconut oil or, our favorite as of late, palm oil, in a frying pan and cook chopped onions, garlic, and some chard stalks if you like. When those are softened, fill your pan with chopped swiss chard leaves. And fry it like you mean it. It's best when leaves are partly crispy. Don't forget to add salt and pepper. I really like the palm oil... mainly because of it's strong flavor. It covers up the swiss chard flavor... ;-) But if you're not used to the flavor, it may be a bit off-putting. Butter's always good. And don't skimp on the grease!
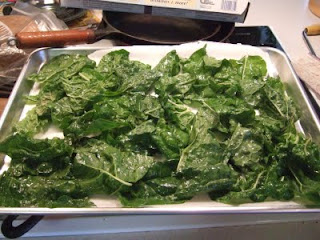
  • Baking. Okay, this one's a bit weird. Recipe for Swiss chard chips. Yeah, you bake the leaves. Basically just toss leaves with olive oil and salt and pepper and bake. One thing I learned with this... the leaves MUST be quite dry before baking, otherwise they just wilt and are limp. Gross. My boys enjoyed the chips, and kept coming back for more. "More crunchy, Mom!" "Thanks for the crunchy, Mom!" It's fun for something different. Also, it's best to eat it all in one sitting... the chips don't keep well in my experience.
    Here's my oven, original from the 1960s... timer doesn't work, though.
  • Dry the leaves well!
    I put parchment paper on the pan before putting on the chard.
    My taste testers... what is this?
  • Substitution for spinach. Basically any type of dish you'd use spinach, I am pretty sure you could use swiss chard.
  • Hotdishes, quiches, sautes, salads, etc. Swiss chard is easily added in to these types of dishes.
  • Whatever your creative mind can come up with! I'm sure there are more ideas than these, but this is the extent of my creativity and willingness to experiment. I'm not quite brave enough to make "green smoothies" that you add veggies to.
We'll probably plant it again next year. But maybe not quite so much..... that stuff is prolific!

Wednesday, August 3, 2011

Garden and Animal Update


Okay, it's about time I posted this, now that it's been over two weeks since I began composing this post....

Here's what we've been up to with our animals and plants:
  • The pigs are getting bigger. They've been moved a couple times, and are currently in a large grove of trees. It's amazing how quickly they root up the ground. Today I saw one of the pigs trying to eat a golf ball. Hmm... how'd that get there?! Runty is growing, but only seemed to make progress after introducing diatomaceous earth into his diet. He must've had worms or something? When they hear you nearby, they love to come running up to you and say hi, usually by trying to nudge your leg with their snout.

  • Broilers. Butchered. Our final numbers were 89 Cornish Cross (white broilers) and 95 red broilers. The red variety took a couple weeks longer to reach butcher weight. I preferred the red broilers... they just looked a lot nicer to me. It took us four weekends, but we finished. My parents came one weekend to help out. We got pretty good by the end of July. There are still some in our freezer if you want to come for a visit to buy some... ;-)
  • Turkeys and dual-purpose birds. Turkeys are growing nicely. We are down to 15 now. Hopefully no more losses. The Ameraucanas are maturing nicely... it's interesting to me how different they all look... some are just brown and black, some white and black, some white, black and brown with some red. The roosters are going through puberty... they try to crow, but it's sort of like their voice cracks... kind of funny. I think it's another couple of months before the pullets will be ready to lay. Then hopefully I'll be able to find some ready egg buyers.

  • Hens are laying okay. Some of the older hens are laying weaker shelled eggs, so we know that we must check for eggs often so there's less chance for them to be broken. The lone rooster in with them keeps them in line. I'm learning how serious a pecking order is. One day a few weeks ago, one hen decided to be difficult and get out of the coop, so my husband decided to let all the hens out to free range for a few hours before bedtime, which is when they naturally all come back to the coop to roost. Albert, the dog, decided to come and chase them. Rooster rounded all his ladies up and ushered them directly back into the pen. And that was that!
  • Cats. Smokey, the Mama cat, had her five kittens two months ago. We are down to three, thanks to Albert. They don't stick close to the house anymore, so they're getting more wild and hard to get close to. Creamy, a male cat, is still around.
  • Albert. Needs training. I'm not a good trainer, and Jeff doesn't have time. He eats everything, it seems like. Chicken poop, broccoli, and junk food--especially when you throw it down the ravine.

  • Garden. We've gotten waaaay too much rain on a plot of land that is very susceptible to flood-like conditions. Much of what we planted got flooded out or grew very poorly--onions, corn (tasseling at 2 ft. tall?!), peas, some beans. The other issue we had was planting some things a bit too early, so most of our transplanted squash was, well, squashed. My tomatoes plants are finally getting a few red tomatoes on them. The swiss chard and cilantro have been producing well, and the potatoes, carrots, and beets look promising! We hope to prepare better next year by digging trenches in certain key areas. We will also prep the ground with more tilling, and will be mixing in some compost, which we didn't do this year. My husband plans to build a greenhouse soon, in which we can hopefully grow a few things into the colder season, though the main purpose of that will be to house chickens during cold weather.
One of several muskmelons.
One of two pumpkins
First tomato!
This is some swiss chard (ignore the weeds...).
The swiss chard growing back after I chopped it!
Some sunflowers...
Our really short corn.
  • Lawn. Our lawn nearest the house had been largely dug up due to that drainage tile project around the house back in April. (It worked, too, no more puddles in the basement!) Well, clay-like soil conditions hasn't been real conducive to growing grass, but it has grown thistles and random weeds pretty well. It's filled in quite a bit, though still patchy. Hopefully it will fill in soon because I feel like quite a country bumpkin! The picture below is the two boys looking out longingly at the backhoe rented for the occasion. I don't have many pictures of my front lawn, mainly because it's kind of embarassing. Maybe later this fall...
  • Till next time, I hope your gardens grow!

Monday, June 13, 2011

We got a grain mill!

Family Grain Mill is manual or electric!

We've actually had this grain mill since mid-April, so we've been using it for about three months.

We bought the Family Grain Mill from Pleasant Hill Grain upon recommendation from our local organic grain and flour supplier, Natural Way Mills. We had been getting our whole wheat flour there, but decided to take the jump into home-grinding our grain because of the health benefits. Grinding your own flour allows you to preserve much more of the nutrients. Organic Gardening and Homesteading website mentions that within 12 hours of grinding, your wheat loses all nutrients, and that if left out over a week, becomes toxic.

Ew.

And that's why the flour you buy in the store usually contains lots of preservatives and synthetic vitamins, to prolong shelf-life, and though the flour may be kept from becoming completely "toxic," it most likely is fairly devoid of readily available nutrients that are found in freshly ground flour.

So, we made the leap to grinding our own grain.

We chose the Family Grain Mill because of the steel burrs used to grind the grain, which grind without friction and use the least amount of heat to grind the grain. Heat can destroy many nutrients in the flour. (Makes me wonder about what happens when you bake with it... but for some reason, it just makes sense not to destroy the flour's nutrients before it even gets to the oven.)

We had the option to buy a hand crank base, as well as an electric base, that hooks to the grinder, in case we'd want to grind flour without electricity. We also got the oat flaker, which takes whole oats and rolls them into oatmeal! There are other attachments, like for meat, you can buy that fit onto the electric or hand crank base. It was also fairly reasonably priced. We didn't want to get a super cheap one that was junk. It's not too loud, and not messy at all.

The option is there to do other kinds of grinding, like rice flour or cornmeal flour, or coarse-grinding grains for a chewier texture, but I've only ever adventured into using Hard Red Spring Wheat Berries and Soft White Winter Wheat Berries at the finest grind.

For the most part, I'm pretty pleased with our purchase. But I have to admit, it's taken some adjusting in how I do my baking. I still haven't completely gotten the hang of making My Fav Sourdough Bread Recipe with freshly ground flour. It just makes for a denser loaf using freshly ground flour, because, at least with our grain mill, it doesn't get quite as finely ground as what we were buying pre-ground. It seems that I usually have to use a little more flour than a recipe calls for, since the flour includes the rough bran which doesn't seem to soak up liquid quite as well. For me, it's not as big of a deal, since I tend to do a lot of "this and that" adding to recipes and go a lot by the look and feel of the dough... yeah, I'm not super great and adhering to a recipe word for word, which sometimes works out great. And other times, not so much.

I've been using a soaked flour recipe that I found from The Urban Homemaker, which is modified from her Hand Method recipe here. I also make my own modifications, like using blackstrap molasses instead of honey and no dough enhancers. It makes a much lighter loaf, while also giving most of the flour a chance to soak, making it softer and more digestible.

I'm still experimenting when I can, in between all my daily tasks. I've tried to do some research on tricks to baking with freshly ground flour, but have been coming up short. So if you have any suggestions, I'm all ears!

Monday, June 6, 2011

Pastured Chicken for Sale

Your chickens on pasture standing at the corner of their moveable pen, made by my husband, Jeff.

The chickens have access to grass and fresh air, and are moved daily to fresh green pasture.

Why buy our local pastured poultry?
  • Their taste is comparable to none
  • They are fed GMO-free feed
  • They taste great
  • They scavenge the ground for their own grass and bugs
  • Their natural flavor will have you begging for more
  • They are free of synthetic hormones, anti-biotics, and vaccines
  • They are processed on-site
  • Did I mention that they taste better than store bought chicken?
  • All of this adds up to a healthier, more nutritious bird, which is all around better for you!
The price is $2.75/lb, dressed weight, with the birds averaging 4-5 pounds each.

If you live in the area, and are interested in coming to visit, please give us a call and let us know when you plan to stop by. Also, if you are interested in ordering, call 218-425-7532.

We will arrange several days for butchering beginning of July, which will also be the pick-up days. It will be fresh! To help keep our costs low, we have decided to have the customers bring their own packaging. A plastic gallon bag per chicken should be sufficient.

If you still aren't sure what the difference is between pastured home-grown chicken and factory-raised chicken, or aren't convinced of pastured chicken's benefits, I found this chart on someone else's homepage who also does pastured poultry. It plainly lays out the differences, which to me clearly points out the superior choice.

Hope to hear from you soon!


Friday, May 13, 2011

Come see our farm!


Okay, so it's been over a month since I blogged. It's not that I didn't want to. It's just that I've been a tad bit busy.

We've transitioned over to the "river house" (dubbed that because our house is next to a river) from the "log cabin house" (well, it's a log cabin!). There are a few items still at the log cabin house (like the really good chicken manure/compost from the chicken coop that we need to add to our garden), but by and large, we've gotten all moved.

Speaking of the garden, we've gotten a big plot tilled, but up here in northern Minnesota, it's taking a while to warm up. The last frost date is June 6, or thereabouts, so it's not like we're in a super rush. We will probably get some cold-hardy things in this upcoming week if we can, like potatoes and onions. Our attempt at doing transplants is not the greatest, one of those things that I'll just have to practice and improve on over time. But we do have two greenhouses within 5 miles of us, so we'll probably patronize them considering our sad looking starts.
We planted some asparagus roots, as well as transplanted some rhubarb.

We've also added to our collection of animals.
  • Currently, we have approximately 300 baby chicks of various breeds and assorted sizes (red broilers that we got first, cornish cross, and ameraucanas which will add to our laying hen stock in the future), and 18 turkey poults. Oh, and by the way, these will be up for sale in a couple months, so does anyone want to buy some chicken?? :-) Their feed is GMO free, and once my husband can get his moveable chicken pens built, the first group of chicks is going on pasture soon.
    These are some cornish cross chicks, just 3 or 4 days old.
  • Turkey poults huddled by light for a nap. They like to do that. One may think that since they are huddled, they are too cold, but they are fine. They run around outside the pen other parts of the day with no problems.
    These are some red broilers, kind of hard to see. But I wanted to show you their brooder box that my talented husband built. They are soon ready to move out into their chicken tractor.
    A view of our garage. Jeff built all these pens. The farthest one is the red broiler pen where they got moved to at 2 weeks. The left is the cornish cross' pen. The right one is the turkey poults' pen. We had the turkeys and red broilers together for about 2 weeks, but at that point it was time to separate them as the broilers were growing so much faster than the turkeys, it just seemed to work better this way.
    The moveable chicken pen. Once planting season is done, he needs to make more...

  • The pigs are helping to till up our garden right now. We have five, one is a runt, I know. Maybe Wilbur will find a spider named Charlotte.... We plan to put them on pasture within an electric fence, and give them screenings from a local mill and whatever else we round up. But for now, they're small enough to fit inside this re-purposed chicken tractor.
    • Andrew loves to watch them. He also figured out to not stick your finger in the holes. They bite.

  • Albert, our puppy. He's cute and cuddly, and well... a puppy. I have to say, I'm still more of a cat person. I like the independent nature of the cat. Puppies insist on being right in the middle of what you're doing, and get soooo excited about everything. So our hope for Mr. Albert is to grow up to be The Great Protector of our life and liberty, fending off the wild animals of northern Minnesota. He's half Golden Lab, half Great Pyrenees... Great Pyrenees are supposed to be good guard dogs, especially of lifestock. But for now, he's Albert, the puppy, who pulls laundry off the line and follows you around, trying to jump up on you.
  • Two cats, Creamy and Smokey... and Smokey is a girl who appears to be ready to have kittens soon. Oy vey. The third cat could not be caught, so Sharpy will be fending for himself somewhere else.
  • And I can't forget our 18 laying hens (and three roosters will will find themselves in our crockpot soon). They went back into their A-frame outdoor chicken tractor. Currently, they're giving us anywhere between 8 and 12 eggs a day. We personally eat a lot of eggs ourselves, and use some to feed to the baby chicks for additional nutrition. But we hope to increase our egg output with the addition of more laying hens, c'mon Ameraucanas!
And the boys, are doing pretty well. They enjoy all the animals and being outside with Daddy while he's working on his different projects around here. Judah had a little trouble with the transition to the new house, but seems to be adjusting alright. Spring planting started a few days ago, so Jeff's been working a lot for the farmer. It's finally been beautiful and warm, and so it's hard to keep the boys inside.
Andrew likes to play in the sawdust.
They love being outside!
Their dad hooked this together. Judah does really well riding the bike!

We were having fun with the timer on the camera.
5/16/11 -- 20 weeks
As always, I'm still fiddling in the kitchen, but that will have to wait for another post. Until next time...


Tuesday, March 29, 2011

Healthy Candy Bars


Yeah, you read that right. I said "healthy" and "candy bars" together.

We recently got a new shipment of coconut oil, we had been "almost out" for a while. I'm one of those people who stretches and stretches the last little bit to make it last a long time... to a point of ridiculousness.

So when we got some more coconut oil, I had to make these "Mounds" Candy Bars from The Nourishing Gourmet's blog. I've made them before, and they're a great way to help us get more coconut oil into ourselves. Sometimes I don't always feel up to just eating a big spoonful of coconut oil--although my boys would eat it by the spoonful if I let them!

Here's the recipe copied from her blog, with my comments in italics.

-------------

“Mounds” Candy Bars-makes 12, large; or 24 mini, which is what I like to do

1 1/3 cup unsweetened coconut flakes 1/2 cup of coconut oil 1/4 cup of honey (raw is nice) 1 teaspoon almond extract 36 almonds, left whole or chopped (your choice) --I had cashews, so that's what I used instead this time around

1-Melt the coconut oil and honey over low heat until just melted. Whisk to combine. Add the almond extract and coconut flakes.

2-Now take out your muffin tins (you will need a 12 compartment muffin tin). In each compartment, place three almonds, or divide the chopped almonds. I wasn't so exacting, just dumped some nut pieces in the bottom of each of the 24 cups. Then, divide the coconut mixture, making sure you get an even mixture of coconut flakes and coconut oil. Place in a freezer (make sure it’s on a flat surface), and freeze until hard (about 30 minutes)

Now it’s time for the chocolate! You will need:

3/4 cup cocoa powder (not dutch cocoa) 1/4 cup of honey (I used a scant 1/4 of a cup) 1 cup coconut oil 1 tablespoon vanilla extract

3-Combine these ingredients in a 2 cup glass measuring glass and place in a pot of simmering water. Heat until everything is just melted, and remove from heat. Either whisk briskly, or use a hand blender to combine well (the hand blender is the easiest way to do this).

4-Take out the frozen coconut flakes mixture, and divide your chocolate mixture over it (about two tablespoons per muffin compartment).

5-Put back into your freezer, and freeze until hard (again, about 30 minutes). To get them out, simply slide a butter knife down one side, and pop it out. This is very easy to do, as long as you do it directly from your freezer.

Then, enjoy! (and keep them frozen, they melt fairly quickly)

------------

When I was popping these out of the pan today, it was probably a bit silly to watch me clean up. It was so good, I didn't want to have any go to waste, so I was practically licking out the compartments. That might be thrifty to the extreme....

Also, a note on why coconut oil is so good for you. It's hard for me to quickly sum up its benefits, so I recommend reading some books like "Eat Fat, Lose Fat" by Sallon Fallon and Mary Enig, or "The Coconut Oil Miracle" by Bruce Fife. Those really explain why a saturated fat like coconut oil is so healthy for us. But a cursory list would include such benefits as: promotes weight loss, improves digestion, helps boost the immune system, and helps prevent against degenerative diseases. I encourage you do to some research and you will be amazed at the benefits of coconut oil.

Wednesday, March 23, 2011

Lots of news


I've been sitting on some information for a while, biding my time until I felt like I could share.

First, we're going to be closing on a house this Friday, March 25. Yes, our time in the log cabin is coming to an end. It's been fun, but I must say, the novelty is wearing off. The holes between the logs, the days when the wind blows down the fireplace and smokes up the house so we can't use the fireplace, the two levels that constantly need policing with two busy boys... we are ready to call some place our "own". It has three acres, not as much as we'd like, but we have big plans for those acres, which I'll share with you as we progress into summer. There are three bedrooms, one bathroom, kitchen with lots of storage, small dining room and a nice big living room. There are two entryway closets, big basement, two door detached garage. The house is a bit dated, old wallpaper and flooring, but easily and quickly fixable. We have until end of April to be out of the log cabin and all moved in.


Second piece of news, we have a permanent location for church. Instead of floating around from restaurant to restaurant, we have a month-to-month lease for a room in the basement of the old courthouse in Roseau. It's not free, but $25/week is about as good as we'll get to have a place to call our "own".

Third, we'll have a third baby to call our "own" beginning of October. I am 13 weeks along as of March 28. I don't think the reality of it has sunk in yet, but there's a reason it takes nine months! I had much stronger morning sickness with this baby than with my two boys, so I'm wondering if it's a girl...? Well, we'll all be surprised together when he/she arrives. But now I'm finally feeling "normal".

I think that's about all the news for now. I think I should be packing or something.... ;-)