Wednesday, October 26, 2011

Andrew turns 2 and an "ice cream" recipe


Just days before having baby #3, Andrew turned two.

October 22, 2011 was a lovely Saturday. For breakfast, we had sourdough barley pancakes--extremely filling!

We took two long walks, one in the morning and one in the afternoon (in an attempt to get labor going!), with our family of four, along with Albert the dog and Kitty the kitty. (Yeah, we just can't seem to call it anything else. It's the only one left from the seven we had earlier this summer!) We spent a lot of time outside, just enjoying the warm-ish sunny weather.

Supper was one of our pastured chickens, potatoes, and carrots, followed by some banana cake--yeah, the same one I made for Judah's birthday minus frosting--with some "banana ice cream". Now, I feel really bad, because I cannot find the blog where I found this recipe--well, it's really a non-recipe. To make this "ice cream" here's all you have to do:
  • Freeze chunks of ripe bananas.
  • Put as much as you think you need (usually around 3-4 bananas is what I use) into food processor and process till well chopped.
  • Add some plain yogurt for a semi-thick consistency... Maybe 1 cup? (Like I said, this is a non-recipe...)
  • Add some cream, not too much, though, maybe 1/2 cup? Otherwise it turns into banana soup... which is okay, then you can just drink it like a smoothie! Blend for a few more minutes.
  • That's it! If you wanted to, you could add cocoa powder, peanut butter, other frozen berries... you can add pretty much whatever you like. And it's so good. We don't add sugar because using ripe bananas makes it sweet enough for our taste buds.
Then he opened up some gifts. I got him an orange ball that he really liked at the store, and some mini construction trucks. He also got lots of things from his grandparents and relatives that he opened up later, like clothes, books, socks, diapers, underwear.


Andrew is quite a guy. For a couple months now, he's been able to count to ten, say most of the alphabet, "sings" many songs such as: Old MacDonald had a Farm, BINGO, Bob the Builder theme song, I Am Jesus' Little Lamb, Farmer in the Dell, to name a few. He loves anything tractor, truck, Polaris Ranger, combine. He joins in with us on most of the prayers we say. A few Sundays ago, he busted out singing the final "Amen, Amen, Amen" at the end of the church service. It was really hard not to burst out laughing. He's a pretty happy guy, that loves being outside swinging or pushing his bike. (He doesn't ride it, just pushes it...) He usually takes a shorter nap than his big brother, so if he thinks Judah needs to wake up, he goes in and wakes him up. "'Ake up, Judah! Juuudah!" You just have to smile.


Monday, October 24, 2011

Announcing....


Enoch Edwin Merseth
Born at 12:14 a.m. on October 24, 2011
Weighing 9 pounds even
21.5 " long
All is well.
Birth story to follow at a later date...

Saturday, September 24, 2011

Judah turns 4 and a cake recipe


Here's a few pictures from on and around Judah's 4th birthday.

We celebrated with Grandma Linda and Grandpa Allan on Labor Day weekend. Judah requested banana cake, and I made a very tasty soaked whole wheat flour cake with cream cheese frosting that was a hit. I followed this recipe for Pumpkin Muffins, but instead of using pumpkin, I sub'd mashed banana, and poured it into a 9x13 pan, which worked just fine. That will definitely be a recipe I will make again and again!

Then we celebrated again the night before his birthday, since we didn't know Daddy's work schedule. I made a shortcake with a raspberry sauce. Wasn't as good as the banana cake, but still tasty. Daddy gave him a BB gun. He also got sidewalk chalk, some coloring books, books, work boots and a monster truck t-shirt (a major fav!).
Andrew lovin' the balloon.

I've started giving Judah "reading lessons" from the book Teach Your Child to Read in 100 Easy Lessons. About a month ago he really seemed eager to know what things said, so I checked out a book from the library about reading and started going thru it. Didn't like that book as well as the one I linked to above. This book lays it all out there for the parent, so I don't have to re-create the wheel, which is nice! It takes about 20-30 minutes a day, plus I'm learning things, too. So this is our start at home-schooling. I also purchased the book The Well-Trained Mind: A Guide to Classical Education at Home. I won't say more than I thought that book was important enough to have my own copy, and plan to follow the plans. Right now, it's important to teach phonics and numbers, and read read read to him, which I do anyway.

The boys are mostly good at playing together, though we have a few issues that we work through every day... Where did these children get their stubborn streak from anyway?! We are working on implementing principles from the book Raising Godly Tomatoes. We're still working on it. We've made some baby step improvements. Let me just say, it's hard being consistent when I'm so pregnant.

Judah also enjoys hearing bible stories, which is our nightly devotion book right now, "The Story Bible" with beautiful pictures. We also have a couple other bible books with pictures that both boys enjoy looking at, and asking questions about. We're also working on the meanings of the Ten Commandments, according to Luther's Small Catechism.

We also have our animal and garden chores which are keeping us busy.

Thanks to God for a healthy boy!

Monday, September 19, 2011

Wild Foraging: Squashberries and Making Jelly


Squashberries. I'll bet you've never heard of them. I hadn't either, until I started doing some research about the plants on and around our property. They're very similar to Highbush Cranberries... if you've heard of those.

I interlibrary loaned a few books on wild foraging from the local library. (I really didn't want to poison my family in my quest for free food!)
  • Edible Wild Plants by T. S. Elias & P.A. Dykeman
  • Cooking with Wild Berries & Fruits of Minnesota, Wisconsin, and Michigan by Teresa Marrone
  • Abundantly Wild: Collecting And Cooking Wild Edibles Of The Upper Midwest by Teresa Marrone

So I had some squashberries on my hands. Thankfully there are no poisonous look-alikes, so that made me feel pretty safe in going ahead with my project.

  1. I picked about two and a half quarts of berries. That was the easiest part.
  2. Then to make sure they were all de-stemmed. That was a little more time-consuming, probably took me at least an hour or so.
  3. Rinse the fruit to get all the bugs and last stem particles out.
  4. Put the fruit in a 5 qt. pot and put enough water in to barely cover the fruit. After I started cooking them, I mashed the fruit. After maybe 20 minutes or so, I let the mixture cool. One thing that I forgot to do was add an orange or lemon rind to the mixture while cooking, which was recommended by one of my library books. It helps to take away the odor of the cooking berries... and I have to admit, it wasn't incredibly appealing to smell while cooking! Next time...
  5. The mixture then went through my cone-shaped strainer. It has a handy dandy wooden mallet to push the mixture through. You need to get all the skins and seeds out. The seeds are a flat, oval shape. (Sorry, no picture...)
  6. I did two "tests" on it before continuing: the pectin test, and the acid test, as explained in the book Canning, Freezing & Drying by the editors of Sunset Books and Sunset Magazine. To test if you need to add extra pectin, you add 1 teaspoon of cooked fruit juice to 1 Tablespoon of rubbing alcohol (70%). (Don't drink this, however, and throw it out when done!) "Juices rich in pectin will form a jellylike mass that can be picked up with a fork. Juices low in pectin will form only a few pieces of jellylike material." My squashberries didn't appear to need added pectin according to this test. To test if you need to add acid such as lemon juice, "compare the tartness of the your cooked fruit juice with a mixture of 1 teaspoon lemon juice added to 3 Tablespoons water and 1/2 teaspoon sugar. If the juice is not as tart as the lemon mixture, add 1 Tablespoon lemon juice to each cup of fruit juice." My squashberries were quite tart, so I didn't need additional acid.
  7. I had about 5.5 c. liquid. Once I got it boiling, I added 3/4 c. honey for every cup of liquid. The "formula" recommended in Canning, Freezing & Drying was to use "about 3/4 to 1 c. sugar for juice with a high proportion of pectin (or 2/3 c to 3/4 c. for juice containing only a moderate amount of pectin) to each cup of fruit juice." So, being the stingy sweetener that I am, I used 3/4 c. honey for every cup of fruit juice. To my tastebuds, it tasted pretty sweet.
  8. Since I didn't use commercial pectin, I was using the "long boil method"... rapidly boiling until jell point is reached at 220 degrees F. The book specifies that "this is at sea level. To test at your elevation, boil water to see at what temperature it boils; then add 8 degrees F. for the jell point." I just went with the 220 degrees. Well, actually I went with 215 degrees because it seemed stuck there for the longest time, and the book cautions against boiling for too long. So, what's a girl to do? What any pregnant girl who's ready for a nap would do!
  9. Put the hot mixture in jars! I had clean pint and half pint jars ready to go, and filled three pints and two half pints. Wipe off the rims with a damp rag, put on your sterilized new canning lids, and screw on the rings. Once they've sealed (when you push on the top and it doesn't make a popping sound), they're all done!
Note: It took a while for this "jelly" to jell. It's been a few weeks now, and the liquid is starting to thicken finally. A few more months and it will probably officially become jelly. I'm sure this can be attributed to the fact that I didn't boil it to its exact jell point. But the amount of pectin in the fruit will make up for my lazy cooking measures over time.

I hope you enjoyed my adventure. I still need to try out rosehips and nannyberries. We'll see...


Sunday, August 14, 2011

Swiss Chard... what to do with it?


After my last post explaining the bounty of our swiss chard, I thought I should tell you what I'm doing with it. Well, trying to do anyway.

I harvest it by grabbing a bunch and cutting it off near the base. More will grow back.

Then you need to wash it. By the way, this is more difficult than you may think. The dirt likes to stick in the celery-like stalks and cling to the leaves. Even after a couple soaks in cold water, I find myself scrubbing at the stalks with a potato scrubber, and using my fingers to get final grains of dirt off the leaves. To do this for each leave is a bit time-consuming. So do the best you can.

At this point, a more particular cook would advocate separating the entire stalk from the leaf. However, since I'm not that particular, I just cut off the bottom part of the stalk and throw it into a pile. You can choose to chop off the stalks and cook them first, since they take longer to cook than the leaves, OR you can give them to your pigs and chickens, OR you can compost them. (And actually, I'm not even THAT particular anymore... I just chop it all up and throw it in the pan!)

There are several options for the cook at this point.
  • Freezing. I throw in as many leaves (wet from their wash) as will fit into my 5-qt. cooking pot and let them wilt till about 1/3 of their size, about 2-3 minutes. Then I throw them in a pan to cool off. I measure some into freezer baggies, and into the freezer they go. I'll plan to use them in egg bakes, quiches, and other hot-dish type entrees.
  • Frying. I heat up butter or coconut oil or, our favorite as of late, palm oil, in a frying pan and cook chopped onions, garlic, and some chard stalks if you like. When those are softened, fill your pan with chopped swiss chard leaves. And fry it like you mean it. It's best when leaves are partly crispy. Don't forget to add salt and pepper. I really like the palm oil... mainly because of it's strong flavor. It covers up the swiss chard flavor... ;-) But if you're not used to the flavor, it may be a bit off-putting. Butter's always good. And don't skimp on the grease!
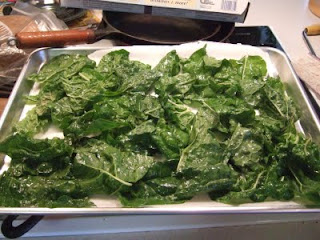
  • Baking. Okay, this one's a bit weird. Recipe for Swiss chard chips. Yeah, you bake the leaves. Basically just toss leaves with olive oil and salt and pepper and bake. One thing I learned with this... the leaves MUST be quite dry before baking, otherwise they just wilt and are limp. Gross. My boys enjoyed the chips, and kept coming back for more. "More crunchy, Mom!" "Thanks for the crunchy, Mom!" It's fun for something different. Also, it's best to eat it all in one sitting... the chips don't keep well in my experience.
    Here's my oven, original from the 1960s... timer doesn't work, though.
  • Dry the leaves well!
    I put parchment paper on the pan before putting on the chard.
    My taste testers... what is this?
  • Substitution for spinach. Basically any type of dish you'd use spinach, I am pretty sure you could use swiss chard.
  • Hotdishes, quiches, sautes, salads, etc. Swiss chard is easily added in to these types of dishes.
  • Whatever your creative mind can come up with! I'm sure there are more ideas than these, but this is the extent of my creativity and willingness to experiment. I'm not quite brave enough to make "green smoothies" that you add veggies to.
We'll probably plant it again next year. But maybe not quite so much..... that stuff is prolific!

Wednesday, August 3, 2011

Garden and Animal Update


Okay, it's about time I posted this, now that it's been over two weeks since I began composing this post....

Here's what we've been up to with our animals and plants:
  • The pigs are getting bigger. They've been moved a couple times, and are currently in a large grove of trees. It's amazing how quickly they root up the ground. Today I saw one of the pigs trying to eat a golf ball. Hmm... how'd that get there?! Runty is growing, but only seemed to make progress after introducing diatomaceous earth into his diet. He must've had worms or something? When they hear you nearby, they love to come running up to you and say hi, usually by trying to nudge your leg with their snout.

  • Broilers. Butchered. Our final numbers were 89 Cornish Cross (white broilers) and 95 red broilers. The red variety took a couple weeks longer to reach butcher weight. I preferred the red broilers... they just looked a lot nicer to me. It took us four weekends, but we finished. My parents came one weekend to help out. We got pretty good by the end of July. There are still some in our freezer if you want to come for a visit to buy some... ;-)
  • Turkeys and dual-purpose birds. Turkeys are growing nicely. We are down to 15 now. Hopefully no more losses. The Ameraucanas are maturing nicely... it's interesting to me how different they all look... some are just brown and black, some white and black, some white, black and brown with some red. The roosters are going through puberty... they try to crow, but it's sort of like their voice cracks... kind of funny. I think it's another couple of months before the pullets will be ready to lay. Then hopefully I'll be able to find some ready egg buyers.

  • Hens are laying okay. Some of the older hens are laying weaker shelled eggs, so we know that we must check for eggs often so there's less chance for them to be broken. The lone rooster in with them keeps them in line. I'm learning how serious a pecking order is. One day a few weeks ago, one hen decided to be difficult and get out of the coop, so my husband decided to let all the hens out to free range for a few hours before bedtime, which is when they naturally all come back to the coop to roost. Albert, the dog, decided to come and chase them. Rooster rounded all his ladies up and ushered them directly back into the pen. And that was that!
  • Cats. Smokey, the Mama cat, had her five kittens two months ago. We are down to three, thanks to Albert. They don't stick close to the house anymore, so they're getting more wild and hard to get close to. Creamy, a male cat, is still around.
  • Albert. Needs training. I'm not a good trainer, and Jeff doesn't have time. He eats everything, it seems like. Chicken poop, broccoli, and junk food--especially when you throw it down the ravine.

  • Garden. We've gotten waaaay too much rain on a plot of land that is very susceptible to flood-like conditions. Much of what we planted got flooded out or grew very poorly--onions, corn (tasseling at 2 ft. tall?!), peas, some beans. The other issue we had was planting some things a bit too early, so most of our transplanted squash was, well, squashed. My tomatoes plants are finally getting a few red tomatoes on them. The swiss chard and cilantro have been producing well, and the potatoes, carrots, and beets look promising! We hope to prepare better next year by digging trenches in certain key areas. We will also prep the ground with more tilling, and will be mixing in some compost, which we didn't do this year. My husband plans to build a greenhouse soon, in which we can hopefully grow a few things into the colder season, though the main purpose of that will be to house chickens during cold weather.
One of several muskmelons.
One of two pumpkins
First tomato!
This is some swiss chard (ignore the weeds...).
The swiss chard growing back after I chopped it!
Some sunflowers...
Our really short corn.
  • Lawn. Our lawn nearest the house had been largely dug up due to that drainage tile project around the house back in April. (It worked, too, no more puddles in the basement!) Well, clay-like soil conditions hasn't been real conducive to growing grass, but it has grown thistles and random weeds pretty well. It's filled in quite a bit, though still patchy. Hopefully it will fill in soon because I feel like quite a country bumpkin! The picture below is the two boys looking out longingly at the backhoe rented for the occasion. I don't have many pictures of my front lawn, mainly because it's kind of embarassing. Maybe later this fall...
  • Till next time, I hope your gardens grow!

Monday, June 13, 2011

We got a grain mill!

Family Grain Mill is manual or electric!

We've actually had this grain mill since mid-April, so we've been using it for about three months.

We bought the Family Grain Mill from Pleasant Hill Grain upon recommendation from our local organic grain and flour supplier, Natural Way Mills. We had been getting our whole wheat flour there, but decided to take the jump into home-grinding our grain because of the health benefits. Grinding your own flour allows you to preserve much more of the nutrients. Organic Gardening and Homesteading website mentions that within 12 hours of grinding, your wheat loses all nutrients, and that if left out over a week, becomes toxic.

Ew.

And that's why the flour you buy in the store usually contains lots of preservatives and synthetic vitamins, to prolong shelf-life, and though the flour may be kept from becoming completely "toxic," it most likely is fairly devoid of readily available nutrients that are found in freshly ground flour.

So, we made the leap to grinding our own grain.

We chose the Family Grain Mill because of the steel burrs used to grind the grain, which grind without friction and use the least amount of heat to grind the grain. Heat can destroy many nutrients in the flour. (Makes me wonder about what happens when you bake with it... but for some reason, it just makes sense not to destroy the flour's nutrients before it even gets to the oven.)

We had the option to buy a hand crank base, as well as an electric base, that hooks to the grinder, in case we'd want to grind flour without electricity. We also got the oat flaker, which takes whole oats and rolls them into oatmeal! There are other attachments, like for meat, you can buy that fit onto the electric or hand crank base. It was also fairly reasonably priced. We didn't want to get a super cheap one that was junk. It's not too loud, and not messy at all.

The option is there to do other kinds of grinding, like rice flour or cornmeal flour, or coarse-grinding grains for a chewier texture, but I've only ever adventured into using Hard Red Spring Wheat Berries and Soft White Winter Wheat Berries at the finest grind.

For the most part, I'm pretty pleased with our purchase. But I have to admit, it's taken some adjusting in how I do my baking. I still haven't completely gotten the hang of making My Fav Sourdough Bread Recipe with freshly ground flour. It just makes for a denser loaf using freshly ground flour, because, at least with our grain mill, it doesn't get quite as finely ground as what we were buying pre-ground. It seems that I usually have to use a little more flour than a recipe calls for, since the flour includes the rough bran which doesn't seem to soak up liquid quite as well. For me, it's not as big of a deal, since I tend to do a lot of "this and that" adding to recipes and go a lot by the look and feel of the dough... yeah, I'm not super great and adhering to a recipe word for word, which sometimes works out great. And other times, not so much.

I've been using a soaked flour recipe that I found from The Urban Homemaker, which is modified from her Hand Method recipe here. I also make my own modifications, like using blackstrap molasses instead of honey and no dough enhancers. It makes a much lighter loaf, while also giving most of the flour a chance to soak, making it softer and more digestible.

I'm still experimenting when I can, in between all my daily tasks. I've tried to do some research on tricks to baking with freshly ground flour, but have been coming up short. So if you have any suggestions, I'm all ears!