Monday, April 26, 2010

Judah and the Big Boy Bed


Sounds like a bedtime story, doesn't it? Well, thankfully this story has been short and sweet.

The bed came. The bed got set up. The bed got slept in. The End.

Grandpa Merseth came on Friday, Apr 23, bearing gifts. He brought a wooden church for Judah to play with. And most importantly, the big boy bed. Here it is getting set up. Of course, Judah had to help.


And here he is reading in bed.

And here's the church. Yes, the roof it off. Judah was filling it up with blocks.

Judah in the bathtub with a mohawk by Mom.

And here's a shot from 4-26-10. I don't think there's any explanation really needed. :-)

Saturday, April 24, 2010

Andrew @ 6 months


We've reached the 6 month mark with Andrew. He's a delightful little boy who has a contagious grin. As long as he's clean, fed, and relatively well-rested, he's golden. Of course, that state doesn't really last very long for a baby...

We're still dealing with some serious scratching issues. We'll find him smiling and cooing in his bed in the morning, with a fresh self-inflicted gash on his forehead. I tried socks on his hands once, but he got mad. During the middle of the night, mad is not good. I tried a hat, but he just pulled it off.

Some sources say that scratching the head is a sign of teething. Well, he's got one tooth that made its appearance two weeks ago. And a second one that just poked through.

I'm wondering if he could be scratching also because of some cradle cap, or at least what I think is cradle cap. Andrew's had it for about three months now. I'm hoping it will go away soon. I put oil on it to help loosen it and then try to comb it out. There are many home remedies out there. I've tried baking soda which seems to be helping some.

Anyway, right now I try to distract Andrew from his teething pain as much as possible. It's nice if we can go outside and he can watch Judah play.

In one week we fly to Virginia for a wedding. I am a little nervous and have a lot to think about before we leave. Wish us luck!!

And now, the pictures!

We were playing peekaboo while sitting in the high chair, which we just sit in at meal times. We don't eat yet. But I'm not concerned. He's not showing signs of readiness, like being able to sit unassisted or losing the tongue thrust, so I figure there's no point in forcing something that would just make him and us frustrated. We already tried food, and it was frustrating for both parties! He's growing, and that's the main thing.

Where Andrew is, Judah's always close by. Judah loves getting pictures taken sitting in the chair with his brother. Andrew is six months old in this picture!

Andrew is getting more rolly, as in, he goes from his stomach to his back, back to stomach, stomach to back. So he gets around.
This picture was taken 4-26-10. I love it when they're smiley!

Friday, April 16, 2010

What to do with whey from cheesemaking?

From my cheesemaking expedition, I found myself in possession of nearly a gallon of whey.

You could throw it away. But since I'm not one to throw a usable product away, I saved all the whey. We've almost finished up the whole bucket of whey in a couple weeks now, and here's what we used it for:
  • Added to soups and stews. To keep the benefits of whey, add it after the soup is cooked. After it gets heated up to a certain temperature, it loses its benefits. We pour stew into bowls then add the whey into the individual servings.
  • Use to soak grains and flours to make them more digestible. I've soaked oatmeal for breakfast and a granola bar recipe. I've soaked flour for bread making. Instead of using a few tablespoons and mostly water, I'll use whey as the entire amount of soaking liquid. Oh, I made some delicious homemade sourdough English muffins this way!
  • Rehydrate dried foods. I even used some whey to rehydrate some dried tomatoes and mushrooms that I used in a meatloaf recipe. It gave them a bit of a tang, rather tasty.
And there are more ideas here! I am totally freezing some whey to use in the kefir shakes we've started having every morning. We've been using plain water ice cubes, but we can pack in more protein by using whey ice cubes! What a "duh" moment, like why didn't I think of that myself?!

I'm going to make some whey ice cubes right now!

Wednesday, April 14, 2010

My first excursion into cheesemaking

Ever since we got our hands on some rennet a couple weeks ago, I've been wanting to try my hand at the art of cheesemaking.

Well, I did make cheese, and learned a few things in the process. I figure it can only get better from here! :-)

I followed the process found in "Wild Fermentation" by S. Katz. If you want a more detailed description, I recommend checking out his book. But here's the basic recipe with my comments.

Rennet Cheese
1 gallon whole milk (I used raw)
1 cup yogurt and/or kefir (I used kefir)
3 to 10 drops rennet (I used Malaka Brand, and about 8 drops, which made a very hard cheese)
3 Tablespoons sea salt

1. First you "ripen" the milk by adding the live culture of kefir. It adds flavor and health benefits, but this step is not essential. I poured the milk into a stainless steel pot, added the kefir, and heated it to about 100 degrees. Katz says between 90-110 degrees is okay. Maintain that temperature for 1-2 hours. Once I had it at the right temperature, I wrapped the pot in a towel and set it on my counter.

2. Mix rennet with 1/4 c. water before you add it to the milk. With the milk still around 100 degrees (reheat it if you have to), stir the milk while you add the rennet-water mixture. But stop stirring once you've added it. The milk has to be still while the rennet works its magic. The more rennet you use, the harder the end product. When I do this again, I plan to use fewer drops, like 4 or 5. My cheese was extra squeaky since I used 8. Within 1/2 hour, the milk will coagulate and form a curd, pulling away from the sides of the pot.

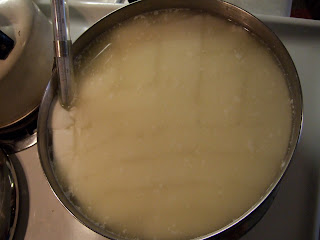
3. Once this coagulation has happened, cut the curd with a long knife into roughly uniform one inch size cubes. You can barely see the gridlines in the photo below. This step provides more surface area for the rennet to work. Be gentle with your cutting, as the curd is fragile and needs to be sliced rather than broken... that's what Katz says, anyway! As you cut curds, keep them moving gently to keep from sinking.
4. Keep it warm at just above body heat temperature for about ten minutes after cutting the curd. Keeping it warmer longer, up to an hour, will make a harder cheese... which is what I did, and helped to contribute to my very firm cheese. Don't increase the temperature fast, because that will result in a crumbly, grainy cheese.
5. Strain and salt cheese. Use a dish towel or cheese cloth over a strainer and pour the cheese/whey into the strainer. Here's where my life got in the way. I should've salted before I strained all the whey off. I poured off some whey so you could see what the curd looked like:
I should've salted at this point, but instead I squeezed out most of the whey before salting it, and let it sit while I took care of crying children:
And so the result was a not very salty cheese in a weird shape. And cheese without salt isn't very tasty, in my opinion. Salt also helps push out the whey, so you're not supposed to be scared to use a lot of salt. Twist the cloth so the cheese is pushed into a ball, and let it drip out remaining liquid.
6. You can serve the cheese young or aged. I didn't age it much, mainly because I'm impatient to eat it. I could've let it form a protective skin to help preserve it, by rewrapping the cheese ball every day with fresh cheesecloth until the cloth is no longer wet from the cheese's moisture, then wrapping it up and putting it in a cool dark place.
I tore my cheese into small chunks like curds. Judah didn't care if they were salty or not, he ate them right up. The longer they sit, they'll develop a richer flavor.

The lessons I learned:
1. Less rennet
2. Add salt sooner
3. Shape the cheese sooner
4. What to do with all the whey... we'll save that for another post!

Eat your heart out!


Eat your heart out! Well... more like, I will eat your heart out. This is a heart. Talk about the ultimate Valentine's Day meal... haha... Actually, this is only part of a cow's heart. We didn't think to take a picture before we ate part of it.

That's right, we ate beef heart for the past several meals, and will eat it for a few more. Wow, a cow's heart goes a long way.

And the same things apply for the heart as for the beef tongue I mentioned earlier this month. It's nutrient dense, inexpensive, and tasty. It tastes very similar to the tongue. It has a nice firm texture.

Here are a few ideas for fixing beef heart:
  • Cut it up into chunks and put it in the slow cooker with some chopped onions and celery, and a couple bay leaves.
  • Put the leftover chunks and juices from that into a stew. I like using barley. Cook the barley for about 30 minutes, and when it's almost all the way cooked, add in some cut up carrots, celery, and onions, and cook for 10 minutes more, so everything's cooked. Don't forget to add some salt and pepper.
  • Thinly slice the meat. Get the griddle good and hot with plenty of grease. Brown both sides at the high temp, then turn down and cook for a few more minutes till cooked thru. Don't forget to salt and pepper the slices. I served this on some homemade sourdough buns.
  • Chop up meat into small pieces and season with taco seasoning, serve in a tortilla with sour cream and salsa.
Yum!

Friday, April 9, 2010

End of March, Beginning of April

This is just before Holy Week until after Easter.
Just some photos to tell what we've been up to.

We celebrated Grandma Linda's birthday with a pie. Judah helped blow out the candle, surprise, surprise!

Mid-week of Holy Week, it got super nice outside, so we went outside to play! I think it was the first time Andrew has been outside and not in his carseat covered up by mounds of blankets. Hello, sunshine!
Too bright!
Getting some trike time.

Maundy Thursday and April 1st!
April 2nd--This is the only time I can get him to be still.
Andrew likes to scratch himself on the head with his sharp fingernails. And so I'll find him after his nap, with his head bleeding from self-inflicted wounds!!

Little Brother

April 4th--Happy Easter!

Got to have an Easter egg hunt. It was funny because every time Judah found an egg, he had to open it immediately to see what was inside. Then he had to put the item back inside the egg, close it, and put it in his basket, before he would proceed to finding more eggs. Here is Judah with Uncle Tyler.
Judah got to play outside on Easter Sunday with the big boys, too, getting dirty and playing with sharp tools like shovels. Oh, and rides on the 6-wheeler. Here is Judah with Uncles Tyler and Adam.


And here are just some cute shots of Andrew at 5 1/2 months.


Friday, April 2, 2010

Why I love Beef Tongue


THAT is a cow's tongue. Otherwise known as beef tongue. Yes, the picture is a little gross. But don't let looks deceive you.

I love eating beef tongue. You think I'm kidding?! I'm not! I love beef tongue. I'm not ashamed to admit it. Here's why: it's nutrient dense, it's tasty and it's inexpensive.

We don't have it often... I mean, there is only ONE tongue per cow. But when we do have it, it last 3-4 meals. Pretty economical. And since not many people are scrambling to get the tongue, it's usually less expensive. We usually order part of a cow and ask for the organ meats, bones for making soup stock, the fat for making tallow... parts that most people wouldn't normally ask for. But don't let these parts go to waste! But I digress...

I got the recipe from Cheeseslave's blog. It's really quite easy to make. I'll let you visit her website to get the exact details but basically this is what you do.

1. Boil the tongue in water (preferably filtered). The water should just cover the tongue. I didn't cover the tongue, so it took longer to cook. Duh. But if you actually follow the directions, it should take 2-3 hours simmering on low to medium heat. It's done when the tongue skin peels off easily.

2. Take the tongue out and let it sit on a cutting board for 10-15 minutes. You need to to cool off so you can peel off the tastebuds. Then I chopped the meat up.

3. I put the meat back into a frying pan and seasoned with taco seasoning, cumin, some beef tallow... whatever seasoning I had handy to make it taste good in a tortilla. Serve with cheese, sour cream, avocado, lettuce, salsa, whatever you like in your tortilla!

And that's it. Oh, here's a link to a homemade tortilla recipe.